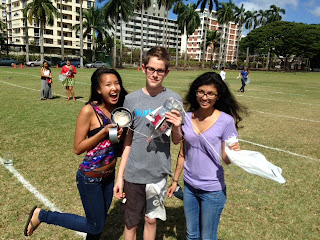
Thursday, July 18, 2013


Before this summer I really had no idea what physics was. Now I think I know what physics is. Physics is motion, sound, and light. Physics plays a role in almost every minute of everyones lives. Physics is everywhere. Its the study of nature, matter and energy, which pretty much is everything that surrounds us.

Add caption
I thought this class was awesome! At first I wasn't excited to be in a class that was six weeks long, and six hours long two days a week, but this class went by so quickly. This class wasn't like a normal class where you sit in your seat all day and listen to a teacher drone on, this class was interesting. We did a lab almost every day to keep things interesting, and we did some pretty fun stuff. I like how the atmosphere was fun and comfortable. I felt like I learned a great deal and was always allowed to ask questions if I was confused.

This summer boy oh boy did we learn a bunch ! First unit we learned about metric conversions and scientific notations which are crucial things that we will probably need in any science class. We also learned about different types of graphs no relationship graphs, linear graphs, inverse graphs, square graphs and squared graphs. All of these graphs will be helpful in the future whenever I am doing work involving graphs. We also learned about accuracy and precision. In the second unit we did a lot of kinematics and I learned about scalars, vectors, and velocity. I learned all of the graphing rules for position vs. times and velocity vs. time graphs. In unit 3 we learned all about acceleration How to get acceleration and how to graph it. We also learned about DATVVo questions and DAT, VAT, & VAD Unit 3 was one big math lesson. Unit 4 was similar to unit 3 it had a lot of math except the problems had to do with projectiles. The major thing we learned is that axes are independent, what happens on the x or y axis stays on the x or y axis. Unit 5 was all about vectors and trig. We learned about Bureku and different forces. We had to know how to diagrams too. We learned about all of newtons laws, law of inertia, law of acceleration and action reaction. This unit had a lot to do with forces and we learned about friction. Unit 6 was similar to unit 5 it involved diagrams. We learned the equation Fnet=ma and about friction. There are two different types of friction static and kinetic. In unit 7 we learned about momentum. We learned about momentum is always conserved and that p=mv. We also learned that objects with momentum will stay with momentum unless acted on by a outside unbalanced force. Elastic is bouncy, in elastic sticks. Unit 8 was a big one. We learned about work, energy and power. Energy is conserved like matter and momentum. Energy is a scalar and there are three different types of energy. There is kinetic, potential gravitational, and spring potential. We also learned equations to get all of these energies. Work = change in energy, force x distance. Power = work divided by time. Unit 9 was about waves, mostly sound waves. We learned about the characteristics of a wave like the wave length, the crest, trough amplitude. We also learned about medium which is the material a wave is in. Period and frequency have to do with the time of a wave. We learned about transverse waves and longitudinal waves. An example of a transverse wave is light and a example of a longitudinal wave is sound. We learned about constructive and destructive interference which has to do with two waves in the same area. Reflection is bouncing and refraction is bending, which we focused more on in the next lesson. Unit ten was a big one. We focused on light and its reflection and refraction. Light is an electromagnetic wave meaning it needs no medium. The two different types of reflection are specular and diffuse. Specular reflection is on smooth surfaces and diffuse is on rough and bump surfaces. We learned about light too, the primary and complimentary colors and how they are different from pigments. We also answered important questions that had to do with light and color like why the sky is blue and why the ocean is blue. The law of reflection states that the angle of incidence= the angle of reflection this was crucial when we were drawing ray diagrams. We also learned snails law which has to do with fast and slow mediums. Depending if the light goes from a fast medium to a slow medium or a slow medium to a fast medium the light will bend towards the normal or away from. Every material has a different index of refraction like water has 1.33 and glass has 1.5. Lastly we learned about drawing light rays in lenses and how to tell if the image was real or virtual, inverted or upright and enlarged or reduced. We figured those things out by drawing parallel rays, focal rays and essential rays,

I liked how this class was really fun. We did so many activities every day, I was never really bored. Mr. Blake always found a way to make the class interesting. Some really fun activities we did were the slip n slide, the bottle rockets, the human pendulums. Labs that I enjoyed were the projectiles one, and all of the light demos and the light lab were really fun too. I liked how we were emailed our grades frequently so that we always knew what our grade was, and didn't have to ask or never know. I have never been in a class where we are emailed our grades and it was a nice change. I also liked the unit packets that we got every unit. They were really informative and had a great unit review at the end. They were good for studying with before any test. I also like how we didn't have a text book like most other classes, just our notes and the worksheets we got. Another thing that I liked was the unit quizzes that were online. They were a good review of things we learned and I used them before every test to study. I liked how our only homework every day was a simple blogpost. The blogpost is a good idea because it is pretty simple but its also a  good and creative way to review over what we learned. I liked how Mr. Blake always wrote our agenda for the day on the board, it was nice to know what we would be doing for the day.

One thing that can be modified is the lack of field trips we took. We did take "field trips" trips to the field but I think that one or two field trips in this course would be a good idea. We could go to the water park to learn about waves or anywhere really because physics is everywhere.

Mr. Blake thanks for being such a great teacher! Even though your from Kamehameha you were still good. You also made class enjoyable to be in with your music and jokes. I also felt like I knew what was happening in class because you were good at repeating information and explaining it well. I had a great summer thanks !
Wednesday, July 17, 2013

Unit 10 - Light Properties (Refraction)

This is a simpler example of some of the stuff we did in class today. Mr. Blake had a laser like in this picture and put glass objects in front of it, with the lights off we could see how the light refracted when it had to travel through the glass. In this picture the light goes through glass and the water, maybe if I had held the laser a little farther away you would of been able to see how the light refracted

In class today we learned SO much! We continued our learning on unit 10 light properties but today we learned about refraction. The main concept that we learned today is snails law. Snells law states that when moving from a fast medium to a slower medium, light will bend towards the normal. It also states that when moving from slow to fast (medium) light will bend away from the normal. This concept was major when we looked at lots of problems involving mirrors, light sources, glass, water, and air. In these problems we had to draw diagrams and snails law was important for all of them. Snells law was important for these diagrams because by knowing the materials that the light went through you could figure out if the light is going from slow to fast or fast to slow, then you could figure out which way the light refracted or would bend. For these problems we also used the equation:
(n1)(sinangle1=(n2)(sinangle2). Critical angle is when n1 > n2 and when the light goes from slow to fast.  Total internal reflection is when the angle of incidence > critical angle.

N is the index of refraction, the ratio is n= c/v where c is the speed of light in a vacuum and v is the speed of light in the medium. Every material has a different index of refraction. For example water and ice have different index of refractions, air and air have the same index of refractions. N of a vacuum=1 , N of air= approx 1, n of water =1.33, n of glass is 1.5, and n of diamond = 2.42. Index of refraction don't have units.

We also learned about different types of rays. Parallel ray is from the object parallel to the optic axis through lens and bend through the focal point on the other side. Focal ray is from the object through the focal point on the object side through lens then parallel. Essential ray goes from the object through the center of lens then continue (no bending). You need to use all three of these rays when you are drawing ray diagrams with lens. For these diagrams you need to state it's characteristics like if its real or virtual, upright or inverted, and if its enlarged or reduced. You can tell if the image is real or virtual by if the rays are converging or spreading apart.

Tuesday, July 16, 2013

Unit 10 - Light Properties (Reflection)


Today we learned a whole bunch! All of what we learned was about light and we focused on reflection. We did a lot of cool demos in class today involving colors of lights. Light colors are different from pigments, like paint. When light colors interact they don't combine to form colors like pigments do. For example when a yellow light hits a blue screen the resulting color is black, for pigments when yellow and blue are added together the resulting color is green, see the difference?

Here is a picture of the colors we learned about. The big circle colors red, blue and green are primary colors, the small colors magenta, yellow and cyan are the complimentary colors. When you add red, blue and green together you get white.


 Today we played around with color for a while. We had 3 projectors with the colors red, blue and green. 2 of the projectors would go on and then we would see what the resulting color would be. Then we would look at a worksheet that had problems like what color would be produced when yellow was shone onto a yellow screen. The answer would be yellow. It all has to do with reflection and absorption 

We learned that there are two types of reflections specular and diffuse. Specular reflection is when a surface is relatively smooth compared to the wavelength of the wave (reflection comes off as it is) . Diffuse reflection is when the surface of an object is bumpy or rough when compared to the wavelength of the wave, ex. light.

 White light is light that has all the frequencies ROYGBIV. White reflects while black absorbs. Shadows are places with an absence of light. The big idea that we learned today is the idea that you can only see light if it is reflected to your eyeballs. 


We learned about things about the earth that I have always wondered about like why the sky is blue and why the ocean is blue. The sky is blue because scattering of the blue wavelengths in the upper atmosphere due to nitrogen. The ocean is blue because water absorbs lower frequency lights. Absorbs ROY and then GBIV is left. Rainbows are because of dispersion. Light bends inside of a raindrop and rainbows are always opposite the sun.


The law of reflection is that the angle of incidence equals the angle of reflection; all angles are relative to the normal. The normal is perpendicular to the surface. Object distance= do= distance from object to mirror /lens. Object height= ho= height of object.  Image distance= di=distance of image to mirror/lens. Image height=hi=height of image. Another thing we learned is that unless there is fog in the air it is not possible to see a beam of light from the source because it is now directly going to your eyes.


Monday, July 15, 2013

Unit 10 Light


 Today we learned about LIGHT, this is why I have a picture of lamp because lamps making light. We learned a lot of terms today. Two important terms we learned are opaque and transparent. Opaque means not letting through, transparent means can go through. The velocity of light = C= 3 x10 ^8 m/s. The velocity of light is faster in space because there is no medium in space, on earth it is a little slower. Sound is a pressure wave meaning it needs a medium. Light is an electromagnetic wave meaning it needs no medium. Light travels faster than sound.
A light year is the distance light travels in one year. Light is a transverse wave and it has electricity and magnitude. We learned all about the different ranges of frequencies today too. Ranging from radio and tv waves to microwaves to uv radiation to x rays to gamma rays. We also learned about light reflectors, an example of this are books, which don't actually provide light, but reflect it. Things like flashlights or lamps or laptops are not light reflectors. Shadows are places with no light.

Saturday, July 13, 2013

Unit 9 Waves and Sound


My picture is of Beats headphones because headphones represent sound and we learned about sound yesterday. We first learned a lot of terms: 
Reflection is the bounding of waves an example is echoes. Refraction is the bending of waves due to changes in wave medium an example is waves at a beach. Dispersion is the spreading out of waves. A standing wave is a wave that looks like its not moving. Natural (resonant) frequencies are the frequencies that an object wants to vibrate at specific depends on physical qualities of an object. Resonance is the increase in amplitude of a system exposed to a force at an objects natural frequency. Ex. a glass shattering after rubbing the top/ vibration, kidney stones and a twisty bridge. Sound itself is a longitudinal wave and needs a medium to travel through. Sound travels fasted in solids, then liquids then gases. Pitch is the frequency of the sound. All frequencies of sound travel at the same speed and temperature, but do not travel at the same medium. 

Yesterday we completed a lab involving a tuning fork. We would hit 5 different tuning forks with different frequencies against our shoe or a harder object, resulting in the tuning fork making a noise. Then we would hold it to a tube that was in a cylinder of water and pull the tube up with the tuning fork until the tuning fork make a loud noise. We would record down the length of the tube from the water then calculate wavelength (x4 the length) and the wave speed (the wave length x the frequency). 

Thursday, July 11, 2013

Unit 9

This picture shows what we learned in class today. Today we learned all about waves today. 
A represents crest or the highest
B represents trough or the bottom 
C represents the amplitude or the distance from the crest or the trough to the equilibrium 
D represents a loop 
E represents a wave 
F represents the nodes which are places between the loops with no movement
The orange parts represent the equilibrium 

Waves are ways of transmitting energy 
Vibration is "wiggle" in time.
Medium is the material that the wave is in. Some waves need a medium to go through. 
Wave length is the length of a wave, it can be measured from two identical portions of the wave. Ex. Crest to crest. 

We also learned about different kinds of waves. There are two types, transverse and longitudinal. Transverse waves are waves that have energy that moves perpendicular to wave velocity. Ex. light Longitudinal waves are waves that have energy that moves parallel to wave velocity. Ex. sound. Period is the time it take for one cycle to occur. Frequency is how many cycles go by in a second, the units for frequency are hertz or 1/ seconds. There are three important equations that we learned: 

Period= 1/ frequency    Frequence = 1/ Period    Wave velocity= frequency x wave length 

We learned a bunch of other terms like the principle of superposition which is when two or more waves are moving through the same space. Depending on direction waves can have a positive sign or a negative sign. If two positive waves or two negative waves collide they have a constructive interference and join together to create a large wave. If one big positive wave collides with a small negative wave they have a destructive interference and will result in a smaller wave. If a positive wave and a negative wave of the same size collide they can result in a flat wave. Nodes are areas of no movement, antinodes are places where there is the most movement. 


Wednesday, July 10, 2013

Water Bottle Rockets 7/10 !

Our water bottle rocket included:

One two liter soda bottle
4 triangle shaped 5 by 1.5 inch fins-
A big funnel that we used as our cone
A ball of clay inside the funnel
A piece of saran wrap to cover the clay
A circle shaped parachute made out of a garbage bag
Four long strings attaching the parachute to the rocket
A lot of duct tape

We got our design from instinct and the internet. The internet told us to make triangle shaped fins, but we chose the size of them. We chose poster board for our fin material because we knew it was sturdy and light. Matt brought in the funnel so we used it. We used a ball of clay because a website told us that clay was a good mass to use and it would stay well in the cone. We at first used a glass circle to cover the clay so the parachute wouldn't stick to it, but it didn't work well so we got a piece of saran wrap and covered the clay so it wouldn't stick to the clay. We used a garbage bag because we thought it would be sturdy and a good size. We cut it into a circle because a website told us to, and we knew that a wider parachute was best. At first we had short strings attaching the parachute to the rocket but Mr. Blake told us to change to longer strings when our parachute failed to do well. We used duct tape because duct tape is the strongest tape.

What worked as planned was the clay, the shape and size of our bottle, and our fins. All these things worked well, and we didn't have trouble with. What didn't work as well was the parachute, the cone, and the strings. The parachute didn't come out more than half of the time. Our small cone broke on our 5th trial because it fell downward and cracked when it hit the ground, good thing we had a bigger cone as a backup. This bigger cone ended up working out much better. It was bigger so that the parachute could fit and open up when in the air. The short strings didn't work yesterday so we got longer strings. The longer strings always got tangled though and on our 16 second trial they got twisted as the rocket was falling down.


PSI: 80
Amount of water: About a liter
Times:
5.59 s
6.71 s
11.87 s
Avg: 8.06 s
8.1 s
5.1 s
6.79 s
9.4 s
5.4 s
16.7 s
Avg: 8.58 s


Project taught us: 


This project taught me that a light mass is better. Our water bottle rocket was pretty light and so it went up higher, lots of other rockets were heavier so they didn't go up as high. This shows us physics because more mass means more inertia. The heavier rockets wanted to stay down so they didn't go up as high.
Also on the first day we filled our rocket up with 1/3 of water, which was not as successful. On the second day we filled it up with 1/2 of water which resulted in a higher rocket.
For your rocket to go high you also need a high PSI too, more pressure means a higher rocket.
We learned from this project that wider and bigger parachutes were also better. This is because they catch more air and result in a longer falling time.
The cones of our rockets couldn't be too secure on the rocket because as the rocket is going up friction is pushing down super hard on the rocket and for the parachute to work the cone needed to fall off, so you had to be sure your cone was loose.
 Longer strings were better because it allowed the parachute to take on more air. Some groups had paper cones, we had a plastic one and ours was more successful because it was stronger against the wind and didn't crush when it fell.


I'm happy with the time of our rocket. All our low times were because our parachute failed to come out, but when we changed to a higher cone, the parachute came out easily. It was really scary watching the rocket fall because the parachute would always only come out at the end about 15-18 ft above the ground. When the parachute came out though it dropped really slowly resulting in a slow time.

Tuesday, July 9, 2013

Water Bottle Rockets


Our rocket consisted of one 2 liter bottle, a funnel as a cone, a circle parachute that was hidden under the cone attached by four long strings,  a ball of clay under the cone, a small glass circle over the clay and 4 small fins on the sides of our bottle. The creation of our bottle rocket took a lot of time, thought and failure to come up with.

Our first creation was only a bottle with a small plastic bag as its parachute attached with tape. The next day we added in a big garbage bag as the parachute and attached it with four short strings. We tested this model on a balcony and decided we should change it a little. We read on the internet to cut the parachute into a big circle and attach it with four short strings, so thats what we did then we put a cone over the parachute. We also read that it was a good idea to add fins so we  hot glued and duct taped in triangle shaped 5 by 1.5 inch styrofoam project board fins. We knew we had to add a mass to the cone, and one site said to add clay. We grabbed a ball of clay from the clayroom and stuffed it in the tip of the cone. Then we went down to the field to launch.

For our first and second trial we used the same amount of water, about 1/3 of the bottle. On our first trial our rocket stayed up for 5.59 seconds, but the parachute didn't work so we tried again, we added in a small glass circle to cover the clay in our cone. We did this because we thought the parachute was sticking to the clay so we put that in so it hopefully wouldn't stick.  On our second trial our rocket stayed up for 6.71 seconds, but still our parachute was not working.


 Mr. Blake suggested we make the strings of our parachute longer, so we traveled up to the classroom and changed the length of the strings. We came back down for our final trial and filled the bottle up 1/2 with water. We pumped up the rocket a lot, build a lot of pressure and on this final trial our rocket stayed in the air for 11. 87 seconds. Yay the longest yet and past 10 seconds! The rocket went up high and our parachute kicked in about 15 ft from the ground. We were happy with 11.87 seconds so we didn't change anything and we hope that tomorrow our rocket will do 11. 87 seconds again.


Monday, July 8, 2013

Unit 8- Work & Energy & Power


Today we learned about powaaahhhhhh, but before that we learned how to graph energy. Energy graphs are different from distance vs. time graphs, velocity vs. time graph or acceleration vs. time. They aren't line graphs, they are bar graphs. On these graphs you have spots for gravitational potential energy, spring potential energy, kinetic energy, work and total energy. You have to read the word problems, and figure out which energies are present then graph them out.

We also reviewed work. Work is a change in energy. Work= force x distance and force= mass x gravity.The unit for work is joules. Energy is always conserved so you can convert work into other things like potential spring energy, gravitational potential energy, and kinetic energy. This is proven by the law of conservation of energy. For these problems use the equation Ein=Eout 

This photo represents a lab that we did in class today that involved power. We had to choose a person, get their mass, figure out the distance of the stairs and then time the person running up the stairs. From this information we could figure out their force, their work, and their power. 


Power is the rate at which work is done. Power= change in energy/ change in time= work/ time. The unit for power is watts or (joules/seconds). Through a lab we learned that a larger mass has a larger power.

Friday, July 5, 2013

Unit 8


Today in class we learned all about energy. I posted a picture of powerade because it is energy drink and represents energy. There is a picture of a person running to represent kinetic energy, energy of motion. There are pictures of a spring and a rubberband because those are sometimes involved in problems involving energy like spring potential energy problems. Law of conservation of energy- energy cannot be created or destroyed it only changes form. Energy is a scalar, meaning it only has magnitude not direction .
We learned about 3 different types of energy:
Kinetic= energy of motion (KE= 1/2 x mass x (velocity)2 = 1/2m(v)2
Potential (gravitational) energy (PEg= mass x gravity x change in height = mgh 
Spring potential energy (PEs= 1/2 x spring constant x (distance the sprig is stretched or compressed)2 = PEs= 1/2k(d)2
Hooke's Law (Fspring= - kd)
Work= change in energy 
W- force x distance (N•M or Joule) 
We also learned some graphing rules 
 1) The area under a curve of a force vs. distance graph is work done 
 2) The slope of a force vs. distance graph is spring constant. 

We completed a bunch of problems all about energy and for all of them we had to use the equations above ^^^ we also used the equations: work=change in PEg and work= change in KE. This problems are pretty simple, once you figure out which type of energy is present in the problem. 


Wednesday, July 3, 2013

Egg Drop Lab


I thought our capsule would work because of a lot of things. First because our box was PACKED with bubble wrap and our egg was wrapped in bubble wrap and a small towel. Since our egg was surrounded by bubble wrap, there was no empty space for the egg to move around and crack. We put our egg directly in the middle of the box and this ensured that no matter where our capsule landed, no matter if it turned over or turned on it side, the egg would have the same amount of bubble wrap secured around it as any other side. Our capsule was also securely wrapped in duct tape that we knew would be very strong and keep the box from opening up. Our cardboard box provided a great, stable and not too small, not too big surface area. This surface area created a good amount of air resistance that pushed up on our capsule. Our capsule was also very light and because of that the gravitational force pulling down on it wasn't so strong. Another force that was exerted on the capsule was friction. All through the fall friction was pulling up on our capsule


Our capsule was SUCCESSFUL! It was successful because our capsule when falling turned a little bit around, it ended up landing on its corner which Mr. Blake said was the best place for it to land because that means the force of the ground is hitting the corner and not the whole 18.5 cm bottom of the box. Our capsule was very stable, we didn't take too many risks and we pretty much knew that our capsule would succeed because it was simple. The bubble wrap was a good idea. The bubble wrap definitely cushioned the blow, increased the contact time with the ground, and kept the egg stationary.

Tuesday, July 2, 2013

Unit 7

Today we did a couple of activities. The picture above shows one of the examples we completed. Two people threw a ball back and forth on a "danger" board and a hover board. Depending on the persons mass they could stay stationary or move back a bit.

Today we also reviewed what we learned yesterday, which was all about momentum (p)
Equation to find momentum : p= m (mass )v (velocity) and momentum is a vector quality.
Impulse is change in momentum and to find the change in momentum you can use this equation : change in momentum=(force)(change in time). We reviewed the law that can be called the law of conservation of momentum which states that in a closed system momentum of a system is always conserved. The unit for momentum is kg•m/s. Another thing that we learned today is that the area under the curve of a force vs. time graph is impulse. The problems that we went over all involved the equation : change in momentum = avg force • change in time. The change in momentum for this equation is momentum final - momentum initial. Also problems like these require you to write a axis, because just like the cart lab that we did in class going one way needs to be positive and going the other way needs to be negative.

Other things we learned today are that forces between two colliding objects of different masses on each other are the same, impulses between two colliding objects of different masses are also the same. Changes in momentum are the same because changes in momentum equal impulse. Changes in speed are different though.

Thursday, June 27, 2013

Semester 1 Review

This semester we learned quite a bit. In unit 1 we learned about accuracy precision, metric conversions, the different types of graphs, graphing, and scientific notation. We focused on graphs and looking at graphs and then figuring out the relationships between the two variables. We also looked at equations of graphs. 
In unit 2 we learned all about scalars and vectors. We learned distance and speed are scalars, and that displacement and velocity are vectors. In this unit we mostly focused on velocity, how to find velocity, V=d/T, position vs. time graphs, velocity vs. time graphs and all of the graphing rules. 
In unit 3 our focus was on acceleration. We learned how to complete kinematics problems which involved the equations DAT, VAT & VAD. We also focused on throwing up balls and the acceleration a ball goes through when it is thrown up which is fast, slow, stop, slow, fast. 
In unit 4 our focus was projectiles. The problems were just like the ones in unit 3, but this time we had values on the x and y axis. The main rule for this lesson was that axis are independent. The problems were complicated at first, but once you got the hang of it they are good. We mostly worked with DAT for these problems. 
In unit 5 our focus was vectors. In this unit more than any we had to use math, trigonometry specifically. We had to use the bureku method and split up the diagonals, then use tan, sin & cos. We also learned about frictional force which is a force that opposes force or impends force. We learned what normal force is and how when we are on a scale that is what is measured. We also focused on newtons three laws, law of inertia, law of acceleration, and action reaction. For the problems in this unit we had to create diagrams, that is key and then from there we could get the answers. 
In unit 6 we focused on newtons second law. Fnet= ma. For problems involving pulleys we had to remember that the acceleration and tensions of the objects were the same because they are all on one string. We also learned about friction and how there are two types, static and kinetic. We learned about one more equation too, force friction=coefficent of friction • normal force. 

I enjoyed that almost every day in class we did something fun like a lab that involved physics but was enjoyable at the same time. The human pendulum, the pool projectile experiment and the slip n slide were some of the funnest. I also enjoyed how the classroom is always fun. I never feel uncomfortable or confused because I know I can always ask questions. 
Unit 5 & Unit 6 have been challenges of mine because of the normal force, friction and diagrams. The diagrams are what always stump me and they are the key to the answers. Another challenge for me was learning about acceleration. I also get confused whether acceleration is positive or negative. Other than those challenges, physics class has been fun, and I feel like I have been learning a lot!

Wednesday, June 26, 2013

Unit 6


Today's class was again like another math class. We focused on newtons second law, law of acceleration which states Fnet=mass x gravitational force. We went through multiple problems involving newtons second law. I learned that force and acceleration have a direct relationship and that mass and acceleration have an inverse relationship.  The first problem went over consisted of a "pulley," which changes direction of our force. The pulley had two weights attached at the ends and because of this we had to draw out two diagrams. Drawing a diagram is the first step that we learned we must do in any problem like this. The second step is finding the acceleration of the system. The acceleration of both diagrams is the same because they are attached by the same string. The third step is to choose oen mass to find T. The tensions of the two masses are the same because they are attached by the same string.
Next we went over elevator problems. For these problems we had to draw a diagram, and from this diagram we figured out our equations. Another thing that I learned to class today is that there is no normal force when the object is not touching a surface, that is why for one of the elevator problems when the cable suddenly broke, the force of the floor on the man in the elevator was 0 because there is no normal force when there is no surface.

Tuesday, June 25, 2013

Unit 5


Newtons First Law (stops because of friction


We continued our learning on unit 5 and force today. We learned the three newton laws and experimented with examples of all of them.
Newton laws
1) Objects in motion or at rest will tend to stay in motion or at rest unless acted upon by an outside unbalanced force.
2. The acceleration of an object is directly proportional to the net force on an object which the acceleration of an object is inversely proportional to an objects mass. (Fnet=sum of all forces in the axis)
3. For every force or action there is an equal and opposite force or reaction, equal in magnitude, opposite in direction.

Newtons Second Law ^ (Testing Weight/Normal force)


We did a few experiments to test each law. For the first law we learned that when we push objects, they stop moving eventually because of friction. For the second law we learned that bathroom scales measure your normal force and that normal= perpendicular to the ground. For the third law we learned that when two things collide they have the same amount of force inflicted on the two objects no matter the mass or size. In our spring scale lab we also concluded that mass and gravitational force is direct; when mass increases so does the gravitational force.

We also continued to learn about vector problems. We had to use trig to figure out some values. For these equations we have to know that the x direction values always equal each other, and the y direction values always add up. Frictional force is a force that opposes force or impends force.

Newtons Third Law (We have equal forces)


Monday, June 24, 2013

Unit 5 - Forces in Equilibrium

This picture represents what we learned in class. We learned a lot about triangles, vectors and trigonometry and to do all this we had to use our calculators a lot especially the sin, cos, and tan buttons.

Today's class was like a math lesson. It was all about trig. We started off my reviewing vectors.
Vectors are equivalent if they have the same magnitude and direction. 2 vectors and the resultant of the two vectors make a right triangle. By using an angle, and a side you can figure out the other angles and the other sides of the triangle. You can figure out the sides and angles of the vector made triangle by using TAN, SIN & COS

tan= opposite/ adjacent
sin= opposite/ hypotenuse
cos= adjacent/hypotenuse

 We learned a few rules for vectors

1) Break up all diagonals=Bureku
2) Add all values together to get the sum of resultant (axis are still independent)
3. Ukerub- make 2 vectors into one. take x and y sums and create a new vector

This photo represents what we learned today about forces. 


We also learned about forces.
 a force is a push or pull (vector quantity, has direction  & magnitude.
Forces in Equilibrium (balanced force)
- objects that are not accelerating are in equilibrium
      •means they are not moving faster or slower or turning.
A normal force is a supporting force that is perpendicular to the surface the object is on. We learned one of Neutons laws. Neutons first law or the law o inertia states objects in motion (or at rest) will tend to stay in motion (or at rest) unless acted upon by an outside unbalanced force. 


Saturday, June 22, 2013

Unit 4


On monday we continued to learn about unit 4 and projectile motion. The picture above is a great example of projectile motion. My friend is jumping off the pole and if I calculated the height of the pole from the water, and the speed she is moving at, I could figure out where she would land in the water. I could figure out this out by using dimensional kinetics which we have learned all about in this unit. In  types of problems we are using x and y distances, accelerations, times, velocities and original velocities.  It takes a lot of organization and the use of DAT, VAT & VAD. For most of these problems the X acceleration is 0 m/s2 and the Y original velocity is 0 m/s, but it really depends on the problem. 
Air Rocket Lab
On monday we also played with rockets. Rockets are a great example of projectile motion. We shot up our rockets using 4 different caps and doing 3 trials per cap. Then we decided which cap was the most consistent. Using the times from the most consistent cap we figured out the average time and initial velocity. Mr. Blake gave us an angle that we would be firing with, we then used our angle and trig to figure out the distance that our rocket would land at. It took a lot of work, organization, and math but my group finally came up with a distance for where our rocket would land. When we went to test our distance, we were very wrong though. I think some errors in our experiment might have been organization, direction of wind, our gas pump and our white cap which was very broken. 

Thursday, June 20, 2013

Unit 4- Projectile Motion


Unit 4
In class today the most important rule that we learned was axes are independent. This rule turned out to be most helpful when we did problems including projectiles like the experiment in the left picture. Our experiment was to shoot a ball out of a projectile and try to be precise and accurate with the place that the ball hit the ground. We had to use the axes are independent rule when we had to figure out distances. We then were given a test height and using the velocity of the cannon that we had already calculated has to mathematically figure out where we should place the paper bulls eye. My group was pretty close when we tested out our distance, but we had a few errors like angles, the position of our projectile cannon and not using the same ball every time.  It was a really fun activity.

We also did a fun pool activity today. A few of my classmates jumped in the pool and we video taped them doing it. Then we took the video and put it up in logger pro. In logger pro we graphed the persons acceleration, velocity and position and it was really interesting to see how the person moved. 

Wednesday, June 19, 2013

1st Quarter Review

Today:
In class today for our lab practical we dropped a thin plastic sheet through a motion detector and examined it's  position vs. time and velocity vs. time graphs. The relationship of the position vs. time graph was squared and the relationship of the velocity vs. time graph was linear. We learned about this yesterday and that a curved position vs. time graphs gives you a linear velocity vs. time graph and acceleration. 


These two pictures of people running is a good example of what we have been learning this first quarter. We learned all about speed, velocity, distance, acceleration and movement. If I wanted too I could graph all of these runners using the great knowledge that I have learned this quarter. 
Unit 1 
In unit 1 we learned about: 
Accuracy- closeness
Precision-consistency 
Qualitative- qualities measurements
Quantitative- numbers measurements
We learned about the 5 different graph shapes no relationship, direct, inverse, exponential, square root and all of their mathematical equations. 
Kilo=1000 Centi=.01 Mili-.001
D= V/ T
Unit 2
In unit 2 we learned about:
Scalar (a number that has magnitude)- distance & speed 
Vector (has magnitude and direction)- displacement and velocity 
Velocity-average speed
Graphing Rules
1. The slope of a position vs. time graph is velocity 
2. The slope of a velocity vs. time graph is acceleration
3. The area under the "curve" of a velocity vs. time graph is distance.

We learned how to tell on graphs when two objects are moving which object is moving faster and which object has moved further. You can figure these out by if which slope is steeper, and which is longer on the x axis. When the lines of a position vs. time graph is direct, then the line of a velocity vs. time graph is a straight horizontal line. 
Unit 3 
In unit 3 we learned about:
A= V/T  Units: m/s2
Curved position vs. time graphs give you acceleration
DAT, VAT, & VAD
We learned how to do kinematics equations and which steps to follow: Write down the question, write down givens, sketch, choose equation, plug in and box your answer. 
We went over lots of graphs having to do with velocity and acceleration. We learned how to go from a position vs. time graph to a velocity vs. time graph to a acceleration vs. time graph. 


Tuesday, June 18, 2013

Unit 3


These two photos show a glimpse of what we did in class today. The focus of our class was on acceleration and using acceleration in real life situations. One of the real life situations that we experimented with is the one shown in the pictures above which is dropping two different sized balls. The question that was asked when we dropped these two balls was would the large ball be faster, would the small ball be faster, or would they be the same. We soon found out that they were of the same speed, even though one ball was significantly larger. 
We also went over multiple kinematics questions and I were tested on challenging problems. By using DAT, VAT, & VAD we were able to complete these problems. I found out that drawing a diagram is very helpful. I learned that for most problems the key is acceleration, as for DAT, VAT, & VAD acceleration is something you always need to know to figure out another variable. I also learned that in most problems acceleration is 9.8 or 10 m/s2 down . This is the acceleration for anything while on earth. 
Graphing:  We graphed cars going down ramps, and graphed balls being thrown up in the air. 
From these graphing exercises I learned that going up a slope means the object is slowing down, going down a slope means the object is speeding up. When a ball is thrown up it's acceleration is fast, but then slows and stops at the top, then goes down faster until it stops in someones hands. 

Extra Credit: Teaching my parent


Monday, June 17, 2013

Unit 3- Uniform Acceleration


As a carousel starts to spin it gradually picks up speed, or accelerates. 

Acceleration= a change in velocity per unit of time 
A= V/ T Units= m/ (s)2

In Unit 3 we learned a lot about acceleration. I could graph the position, velocity, time and acceleration of a carousel. 
We also learned a few equations that can help us to figure out distance, acceleration, time, or velocity. 

Equations: 
d= 1/2(a)(t)2 + (Vo)(t)
v=Vo + (a)(t)
(v)2=(Vo)2 + 2ad 

We also learned steps to help us use these 3 equations

1. Write down the question
2. Write down the givens
3. Make a sketch. 
4. Choose the equation. 
5. Plug in
6. Box answer
7. Check to make sure your answer makes sense. 

All of this information will help if you ever needed to figure out the velocity that the carousel is moving out, the distance that one of the moving animals has traveled, the acceleration the carousel has picked up, or the time that it took for the carousel to go around. 


Today we conducted a experiment using skateboards. We conducted 2 trials on 2 different types of moving objects, a skateboard and a "danger" board. We timed each 5 meters as the boards passed and then graphed the results.  By looking at the graph we noticed that acceleration increased as the skateboard's distance increased down the slanted surface. 
From the results we also figured out one graphing rule: curved position vs. time graphs give you acceleration. 


Friday, June 14, 2013

Unit 2-Kinetics


My picture relates to what we learned in unit 2 because we learned about motion. When people snowboard or ski they are in motion. Going down the slope their velocity or average speed changes as well as their distance and displacement. 

Snowboarders and skiers accelerate as they move down the mountains. 
Acceleration- a change in velocity per unit of time, any time you change your velocity . You can find the acceleration of a moving object by using the formula: A= V/ T

Snowboarders and skiers move quickly down mountains, sometimes skiers are faster some times snowboarders are faster. You can figure out the speed and position of skiers and snowboarders at different times by using graphing and equations. 

The slope of a position vs. time graph is velocity. Position vs. time graph tell you where you are (position.)
The slope of a velocity vs. time graph is acceleration. This type of graph tells you velocity. 

 This information could be helpful when you need to know where a skier or a snowboarder was at a certain time. If the snowboarder has a velocity of 30 mph and the skier has a velocity of 35 mph then you can conclude that the skier is quicker. On a graph the skiers slope will be steeper. 

The area under the curve of a velocity vs. time graph is distance traveled (displacement). If you look at a velocity vs. time graph you can figure out the displacement of a moving object without using an equation.